The miter gauges that comes with most table saws have three important limitations.
Saw blades have a tendency to pull the work piece toward the blade. This may not
be noticeable, but it's enough to result in an imperfect angle. Clamping the work
piece to the fence is necessary for accuracy.
The front surface of the most miter gauges is small and limits the ability to
work with small work pieces.
It's difficult to set most miter gauges at precise fractions of degrees.
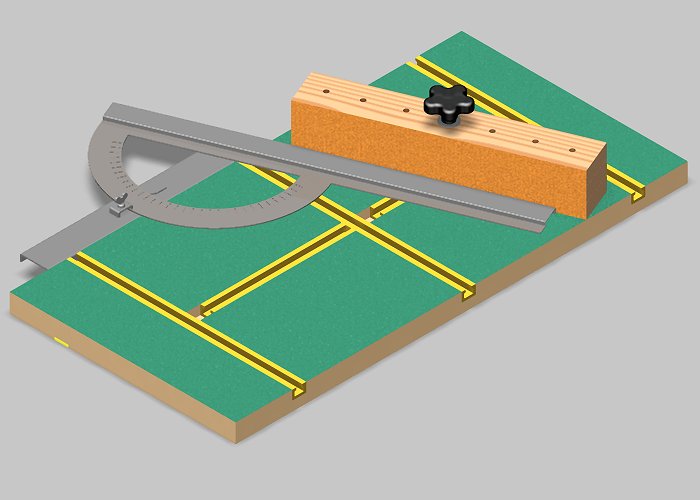
This simple jig solves the problems and limitations of typical miter gauges.
You can clamp your work pieces to the fence to ensure the saw blade cannot
move the work piece.
The seven T-Track bolt holes, along with your table saw sled's T-Track
arrangement, enable you to secure this fence to the exact position you need.
You can set precise angles with a saw guide, triangle square, or other
precision angle tools.
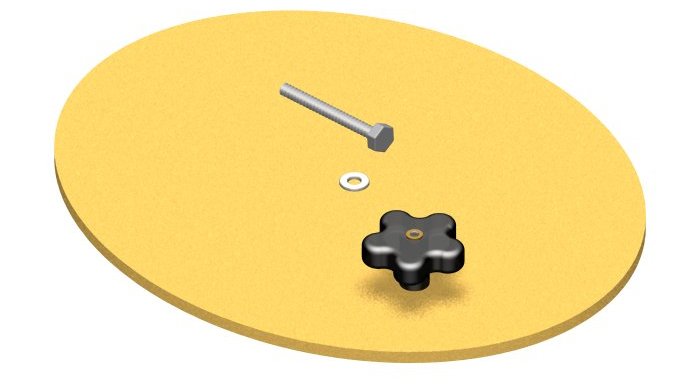
Special Hardware You'll Need
For this project, you'll need:
One small 1/4" threaded knob. (Assuming your T-Track uses 1/4" bolts.)
One 2 1/2" long by 1/4" T-Track bolt and a flat washer.
Note: If you have a bench grinder, you can create your own T-Track bolts from
carriage bolts by grinding the sides and top of the carriage bolt-head
so the head of the bolt slides smoothly thru the T-Track.
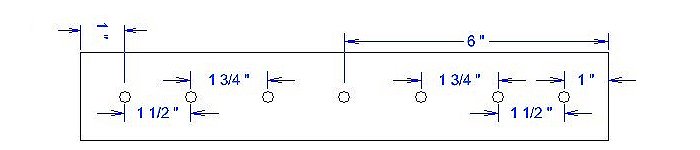
Miter Fence Part Drawing
You'll need three identical pieces of 3/4" thick wood as indicated in the
drawing above.
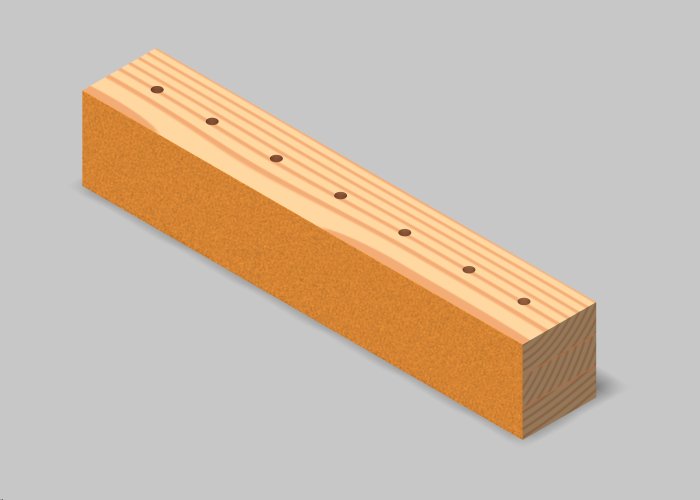
Glue the Pieces in a Stack
Apply glue to mating surfaces and glue the three pieces together as shown.
Be sure the edges of the three pieces are all flush with each other. Then clamp
them together.
Drill the Bolt Holes
The drawing shows several holes. The reason being that it provides a lot
of flexibility in placing the fence.
It's not necessary to drill all these hoes at the beginning, you can
always drill additional holes later.
However many holes you decide to drill, you need to use a drill bit that
corresponds to your T-Track bolts.
Apply the Sandpaper
Cut a piece of 100 grit or 120 grit sandpaper to fit the front surface of the Miter Fence
Block and attach it with contact cement.
The sandpaper really helps in keeping your work piece securely in place.
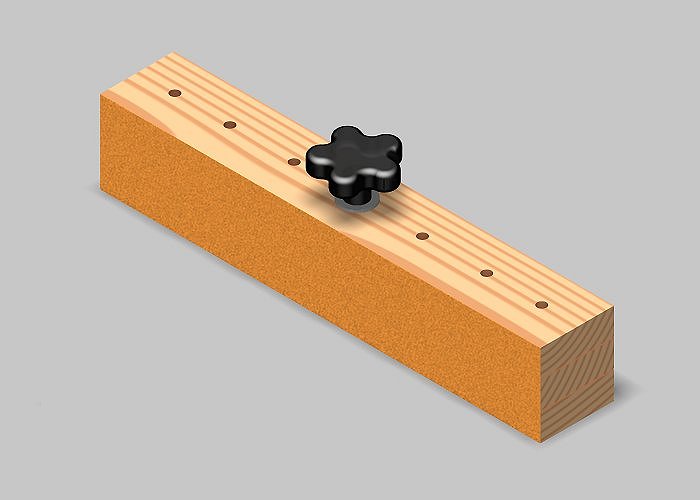
Insert the T-Track Bolt & Knob
Insert the bolt through the preferred hole and add the washer and knob.
Setting Angles with a Saw Guide
You can use a saw guide to set precise angles.
Here, we're setting the angle to 22.5 degrees.
Congratulations! Your Table Saw Miter Guide Ready to Use!
Copyright Notice
We hope you enjoy the free woodworking plans offered on this site. You are invited to
download or print any of the plans free of charge for your own use. Please be aware
that the plans are copyrighted and may not be distributed by any person or company
except here on www.bobsplans.com.
If you know a friend that would like a copy of any of our plans, please send him/her a
link to our site so they can download them from here. We always welcome new visitors.
Please note that there is no PDF file for these Miter Fence plans.
You can either view these plans in your shop with your phone or mobile device or press
the "Print These Plans" button below to print the plans on paper.